
First, let me apologize for being late on this, but the weather refused to cooperate with me. We had massive winds. Otherwise, I would have been showing you how I made the stencil and tee from the other day. But, have no fear, that is on the rotation.
Okay so, that up there is the chalkboard that I made this summer and apparently didn't get very good documentation of how I did it, though I thought I did.

Here is the only picture I seem to have gotten so, the pics of the supplies you will need will all be stock photos, sorry.
Okay, supply list:
First,you'll need Chalkboard Paint. I know that Martha Stewart has a whole blog about how to make your own and shizz, but who has time for that when you can buy it in a can like this? Not me and not for my first project with it. Oh! Don't forget to get a stir stick of some kind with it because it will need a good stir. Behold, the brand I used: 

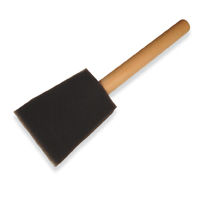
Next, you will need one (or more) of these bad boys. I say one, because that is the least you can have. I had about three, which was great because if you let the paint dry on it even a little, they get too stiff to actually use. And then you might say words that you don't want your neighbors to hear you say. So get a bunch. It's worth it.
Okay, this is possibly the easiest thing to find. As you can see in the one picture I have up there that isn't stock, I found a bunch. I hunt thrift stores for cheap ones - like I won't pay over 50 cents for a frame or I feel like I am being robbed. But you can get ones you have that you don't want any more and use those too. Get a few. You are more than likely going to be like me and once you get going, not want to stop.

Next up, spray paint. I buy a white one to use as a base as well as a good selection of colors. I wait until they go on sale at the local hardware store and buy the ones I think are pretty. So I like to think I have a good stock of them. This time, I had hot pink and yellow and a blue color. And red. Like a fire engine.

Also, you probably are going to want newspaper to set down so you don't get this craft everywhere. WARNING: Chalkboard paint DOES NOT wash off of clothes. So you might want to wear an apron as well. Protect areas you are working on and around is what I am trying to say.
All right. Let's say you have all this stuff done. You have the area well protected and the supplies you are going to need. First up, you will need to take the back off the frame. And the little cardboard bit that makes the picture stay all snug in there? Take that out too. And last, CAREFULLY slide the lass bit out. Otherwise, you are going to break it and, while I have a quick fix for that, it's a pain in the hind end to clean up broken glass. So, just be careful.
Next step is to take both the frame and the glass and spray them with the white paint. This gives you a good base for the other stuff to hold onto. I believe in a good base coat. It helps you not curse later too.
After that has dried - and you HAVE to let it dry - then you can open up your Chalkboard paint and stir the hell out of it. I cannot stress this enough - that needs to be MIXED. Otherwise, you will have a hard time getting it to stick to the glass, even with the incredible base coat you have so patiently waited for to dry.
I chose to do a bunch of frames and glass at once so that I could have more than one to work on because, let's face it, waiting for paint to dry is REALLY boring. So, while I was waiting and making sure that the glass was SUPER dry, I went on to spray the frames with the finial color I wanted. This proved to be a task because I had kids playing with dirt in the yard. As a result, some got really cool texturizing I had not anticipated. Once those were drying though, I went on to the glass.
Here is the thing I learned about chalkboard paint on glass. You should put the paint THICK on the foam brush and make the first coat going up and down. All of it - don't just paint random. You WILL regret it. Second coat - and there has to be one - go the opposite way. If you end up needing a third coat - some of mine did - go the first way again.
They should look like this front and back once dry:


Once you have done all of those and both the frames and the glass is dry, then you are ready to put it all together. I did take mine apart to show you how to do that, so marvel at how simple this bit is:
You take the frame...and flip that bad boy over.


Slide in the glass CAREFULLY. Now it's not just about breaking the glass, but you can't scratch the paint either or you will have to start over, which I can tell you is a pain in the rear end.
Then you slide in the cardboard bit to snug that sucker up. You don't want the glass ratting and breaking and ruining all this hard work!


Then you slide the back on. If it's not tight enough, find other bits of cardboard to make it snug. This makes for a better writing surface.
See? So simple even *I* can do it!


So there you have it. You made a chalkboard. I also painted a used canvas I found in a free bin - it had a tiny rip in it that I fixed with a little duct tape on the opposite side and you can't even really tell...

And I re-purposed an old chalkboard/whiteboard combo that had been left out in the weather - making this a double sided chalkboard so the kids wouldn't fight over the one good side anymore!

Here you can see some bits of the chalkboards drying as I worked on bigger projects with the chalkboard paint. I really got creative. I was almost literally painting everything that didn't move to see if it would take chalkboard paint. This included my nails. And, while it looked cool, there was really no reason as I couldn't even draw one good sized readable letter on them.

HAPPY CRAFTING!
I'd love to see what you guys make if you decide to do chalkboards, by the way.
Looks like fun!
ReplyDeleteIt really was. I am still looking for a good table to transform. And, I painted the inside of one of Mom's cupboards for her to use as a grocery list and reminder spot!
DeleteIf you ever do your nails again and want to write ion them, they have chalk at the fabric stores that is made for marking pattern marks on fabric. Comes in about 2 mm diameter "leads" in a mechanical pencil style holder, and at least starts off with a point on it. Multiple colors, moderate hardness.
ReplyDelete